Creation and management of an Itinerary
Data of the Itinerary
In the sidebar you can enter the route name and a description. You can generate a description using the AI, in this case, you should do it at the end of the configuration in such a way as to allow the AI to use the data to generate it.
Please also enter the date and duration of the trip.
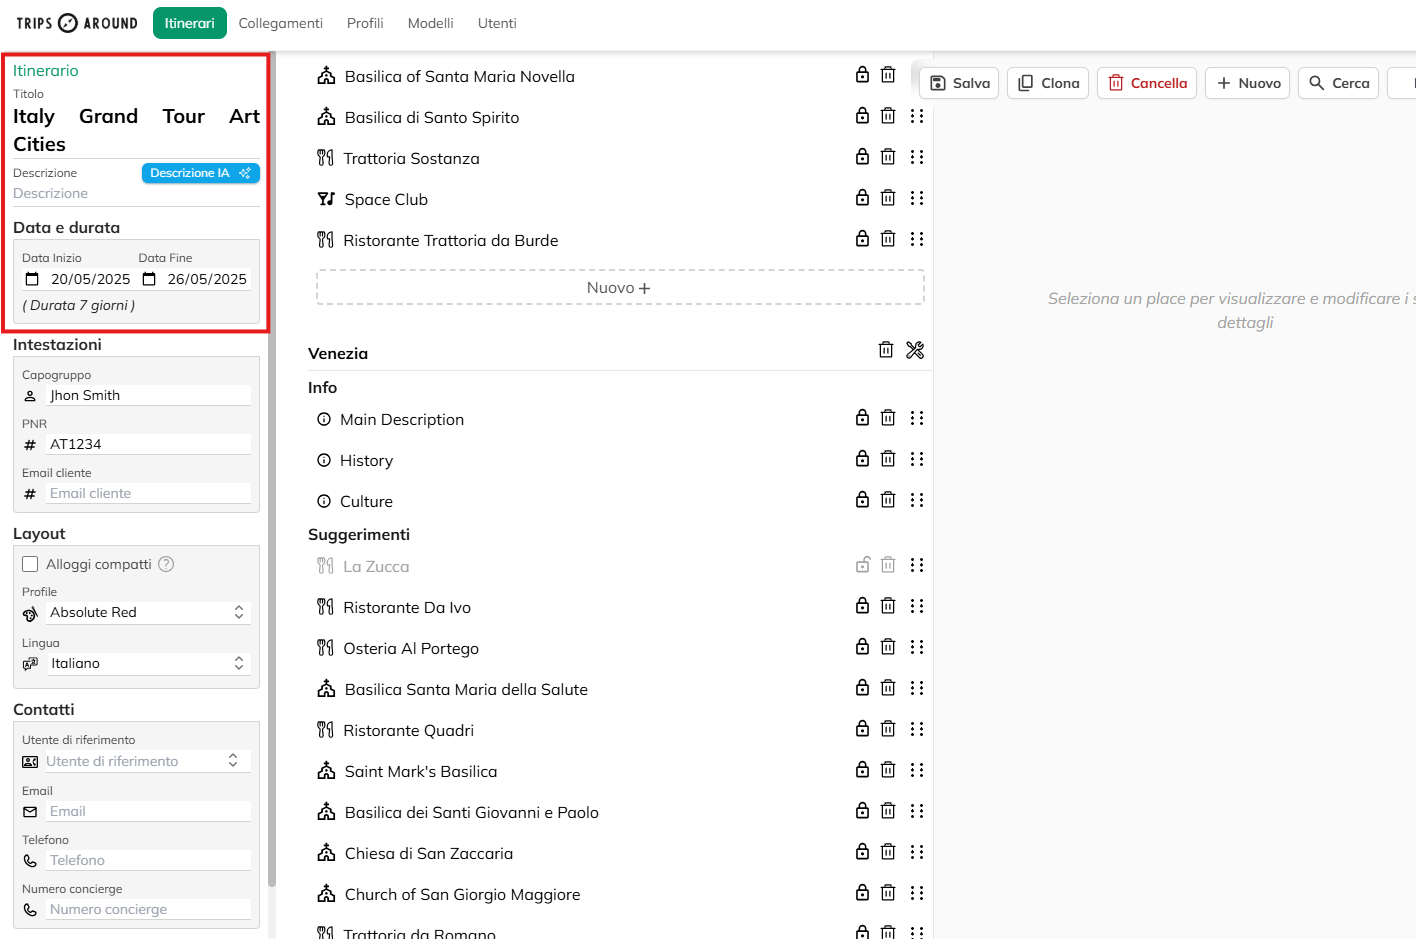
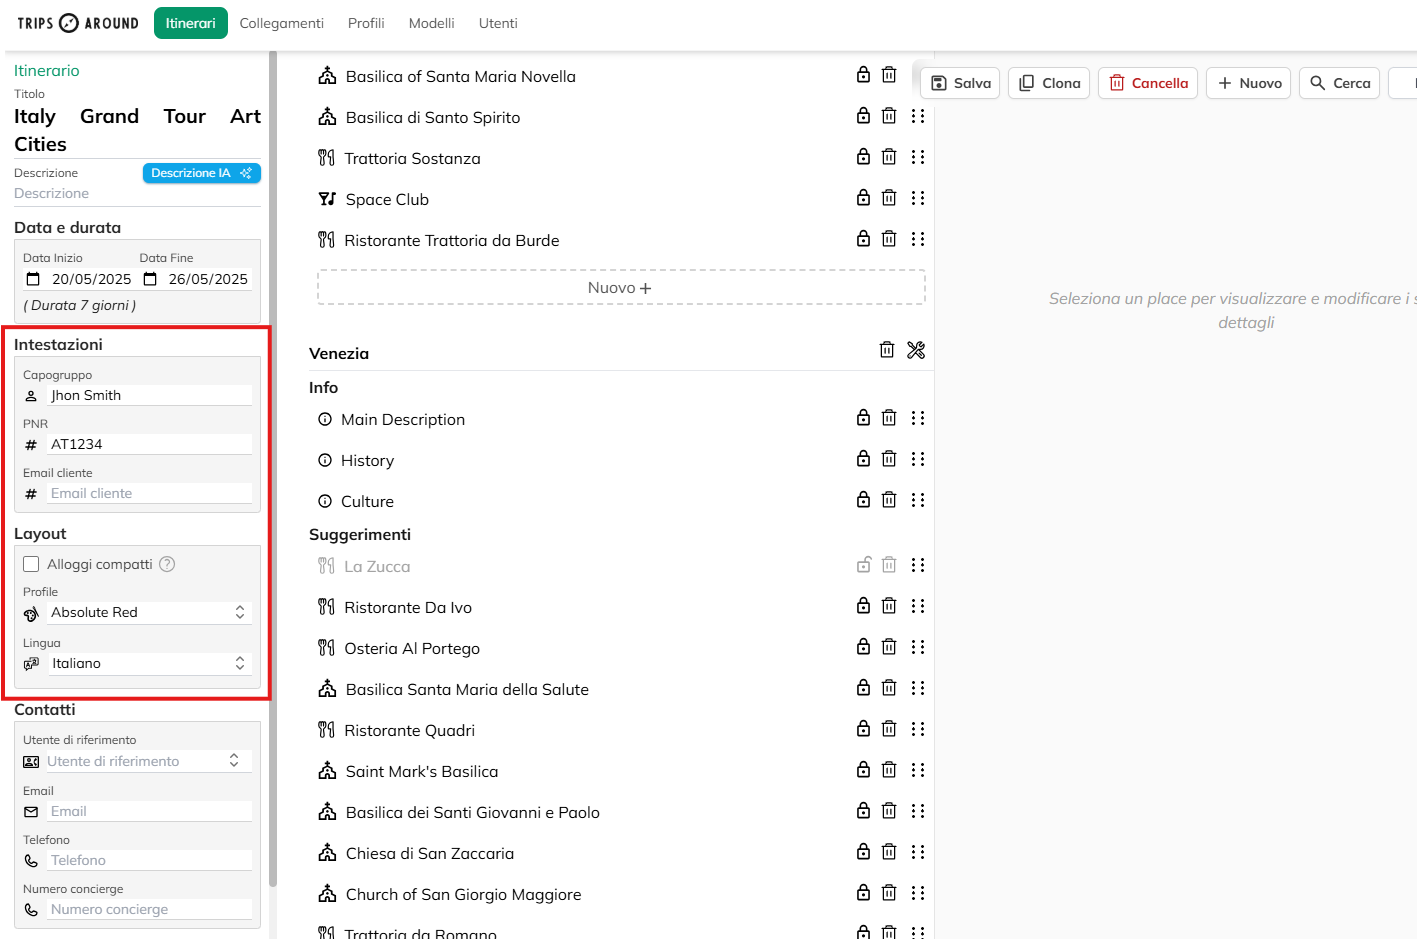
In the Headers section, you can enter the name of the parent company, the PNR code and the email address of the customer.
In the layout section, you can choose from a few options of customization of the itinerary which include the flag to show or not show the detail of the nights, on the inside of the Profile, you can select a theme graph between the profiles already existing.
You can also select the language in which it appears, the system with the help of AI, will automatically create a new route translated into the selected language is available on the search screen. You can also add a new language by clicking on “Add” in the dropdown menu.
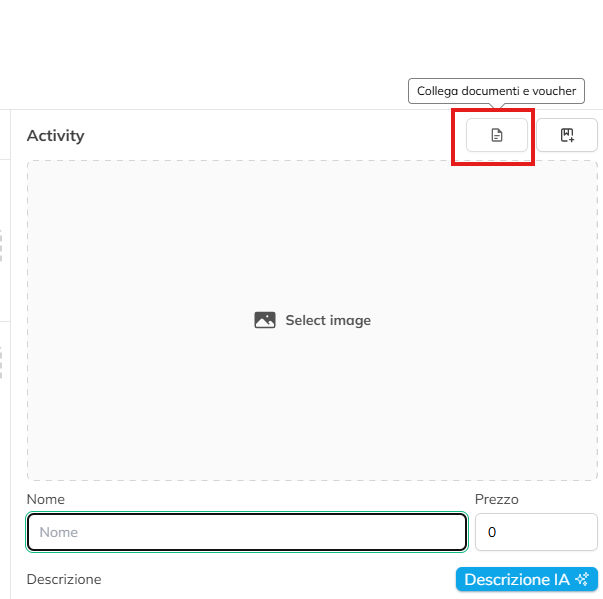
Cliccando su Notifiche potrete aggiungere gli indirizzi email che riceveranno gli aggiornamenti relativi all’itinerario.
Potrete anche visualizzare e gestire le recensioni associate all’itinerario cliccando su “Recensioni”.
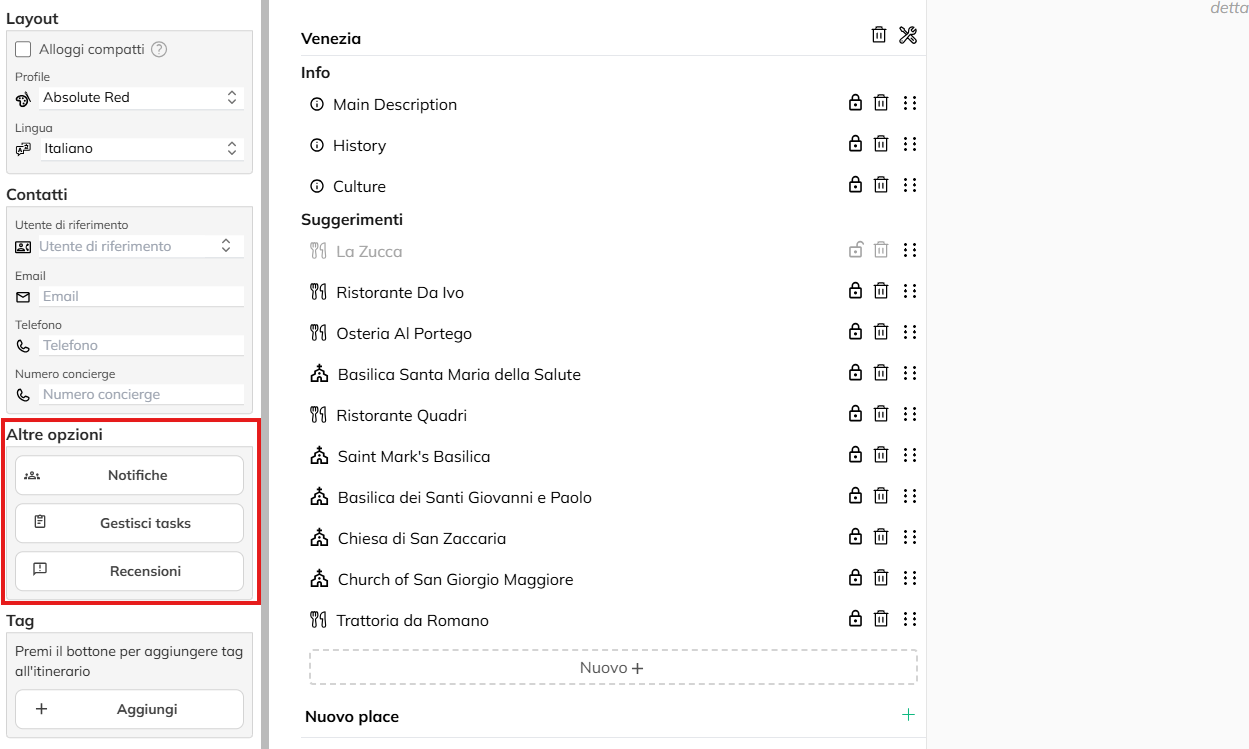
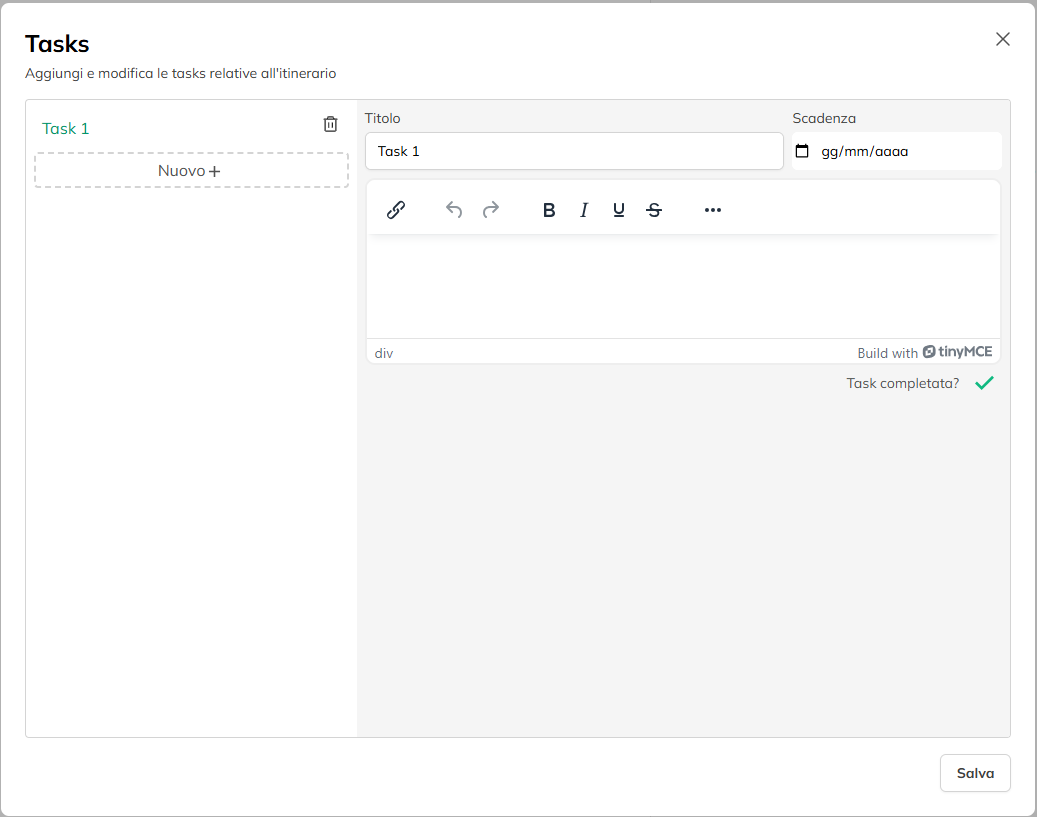
By clicking on “Manage tasks”, you can add or manage all the tasks associated with the route.
Click on “New” to add a new or select an existing one to mark it as closed, or vice versa. The list of task that are open will also appear on the homepage, clicking on which will open the edit screen of the route associated with it.
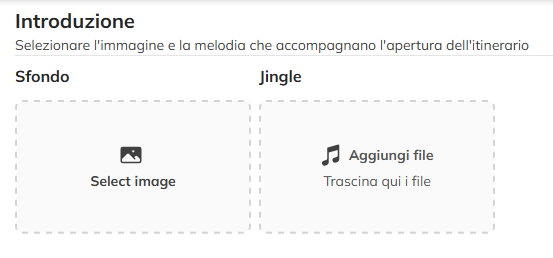
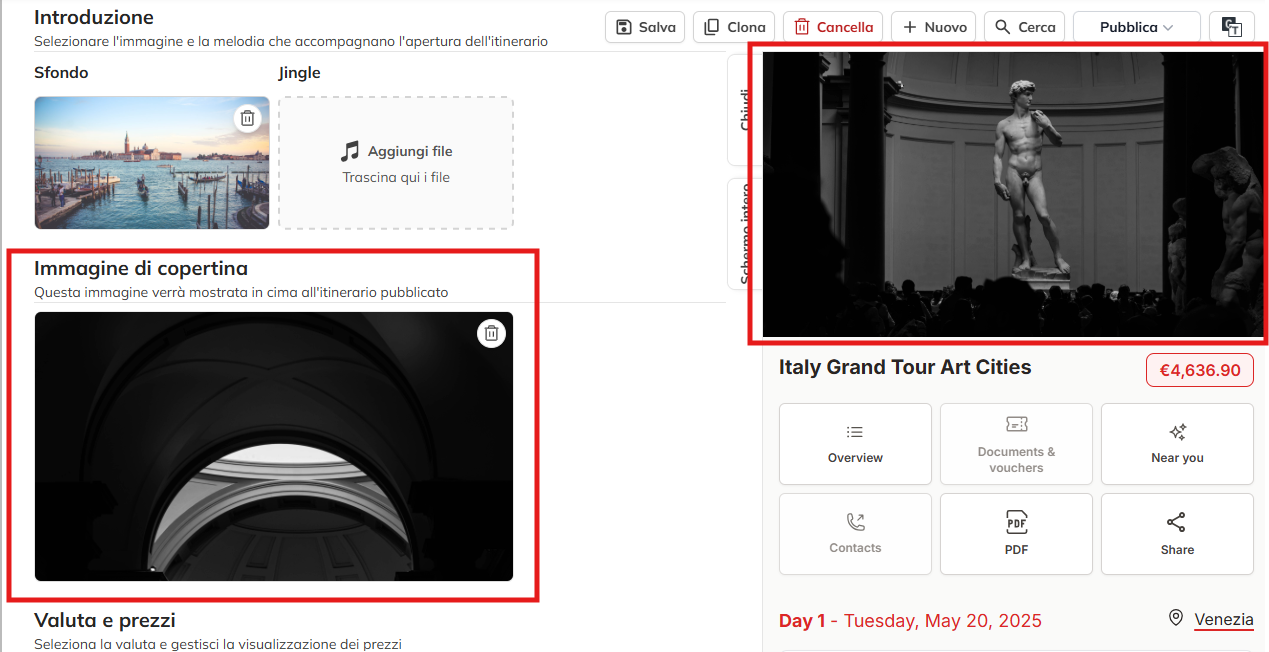
Introduction
Select the image and the melody that accompanies the opening of the route.
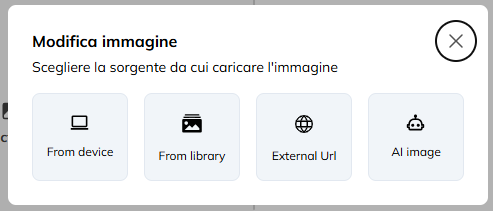
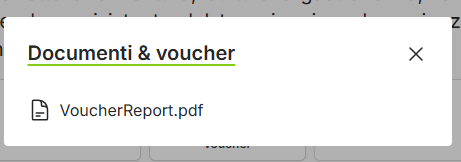
Aggiungere una nuova immagine
Cliccate su “Seleziona immagine”, si aprirà quindi la relativa modale.
Potrete scegliere se includere un’immagine direttamente dal vostro dispositivo oppure sceglierne una di stock selezionando una delle fonti disponibili.
Potrete anche caricarne una da un URL esterno o crearne una con l’utilizzo dell’intelligenza Artificiale.
Generare immagine con IA
Per farlo cliccate sul relativo pulsante inserite un prompt che descriva al meglio quello che vorrete mostrare e attendete la generazione dopo aver cliccato su “Genera”. Se l’immagine è di vostro gradimento cliccate su “conferma” per convalidare la selezione.

Cover image
Then choose a cover image, this image will be shown in the top of the route is published.
To view the preview of the route click on the corresponding button in the top right corner and click on “full Screen” to view it in full screen.
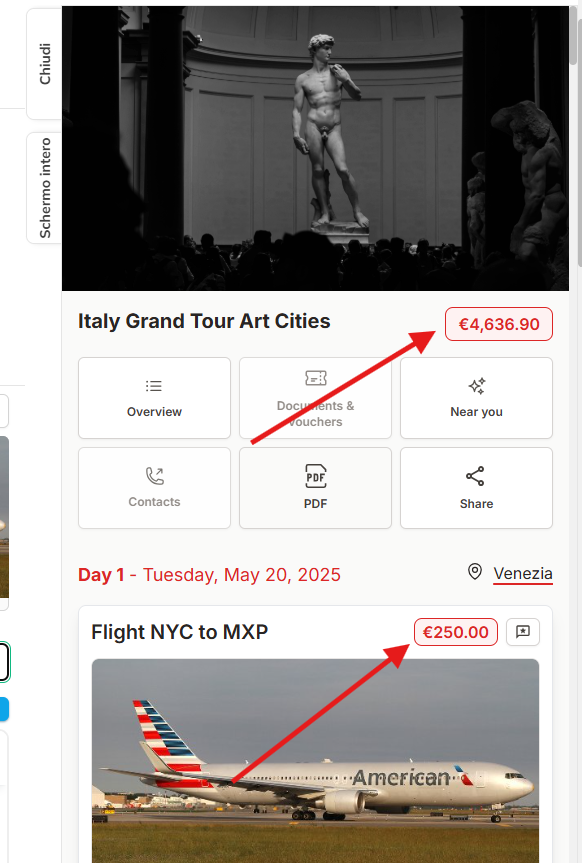
Currency and prices
In the section on Currency and prices, you can manage the currency, and the display of the prices within the itinerary.
By Selecting “Onhave adopted this regulation the total price” you can enable the display of the total price within the itinerazio while checking “Enable price for stage” you will show the price of each single stage.
Then select the currency from the drop-down menu.
You will have the possibility to insert the total price of the itinerary, or you can insert it for each stage of the route and calculate the final price by clicking the “Calculate total price”.
In the field “Percentage” is the percentage of markup to be applied to the route, the system will display the route, the price is recalculated on the basis of the latter.
The structure of the route
We now turn to the structure of the route.
Before you begin building your route, make sure you have entered the start date and the end of the route in the relevant section of the sidebar.
You can add more days to your itinerary by clicking on “Add to day”.
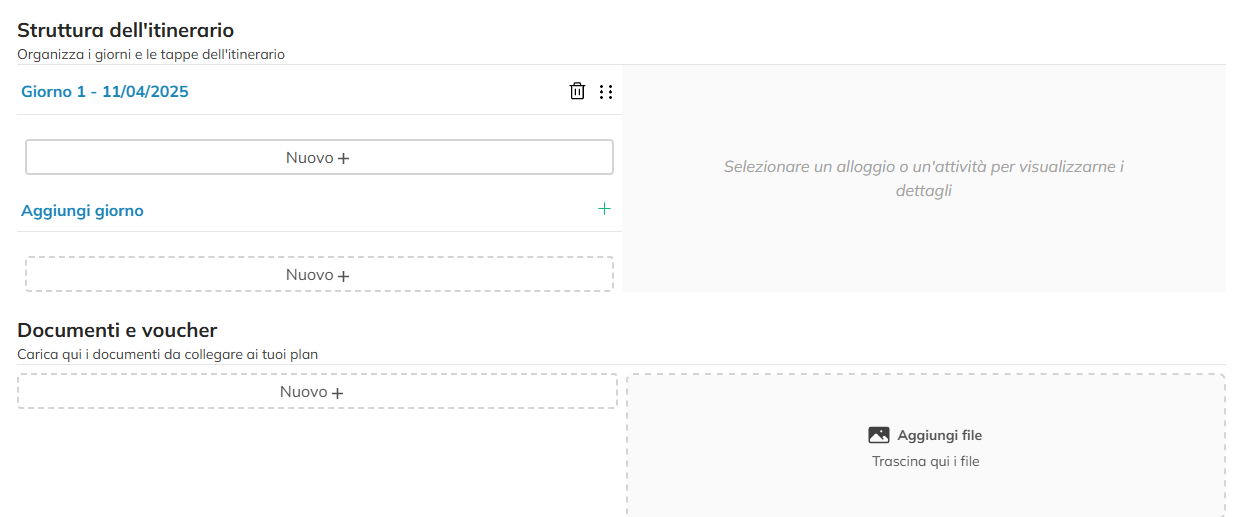
Per ogni giorno potrete aggiungere vari tipi di “Plans” cliccando su “Nuovo”. Potrete scegliere tra varie tipologie di Prenotazioni.
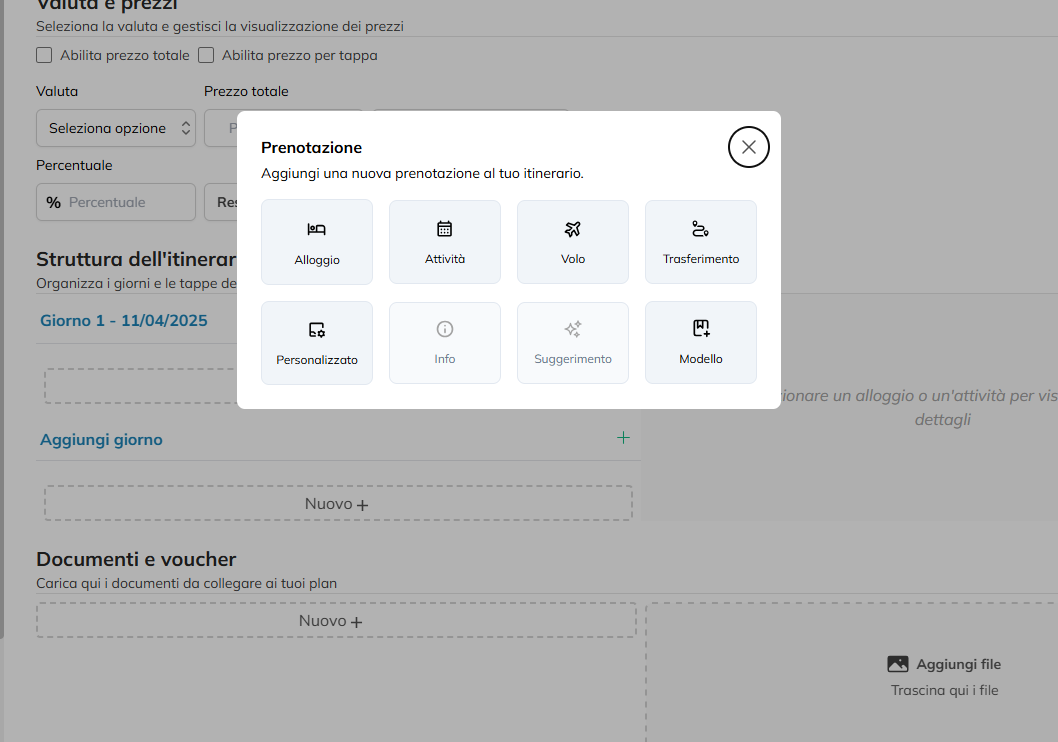
Aggiungere un nuovo hotel
Per aggiungere un nuovo hotel all’itinerario cliccate su “Nuovo” nel giorno desiderato e selezionate “Alloggio”.
Si aprirà quindi la maschera di creazione.
Selezionate un’immagine, inserite il nome dell’hotel e il prezzo.
Inserite una descrizione tramite l’apposito editor di testo o generatene una usando l’IA.
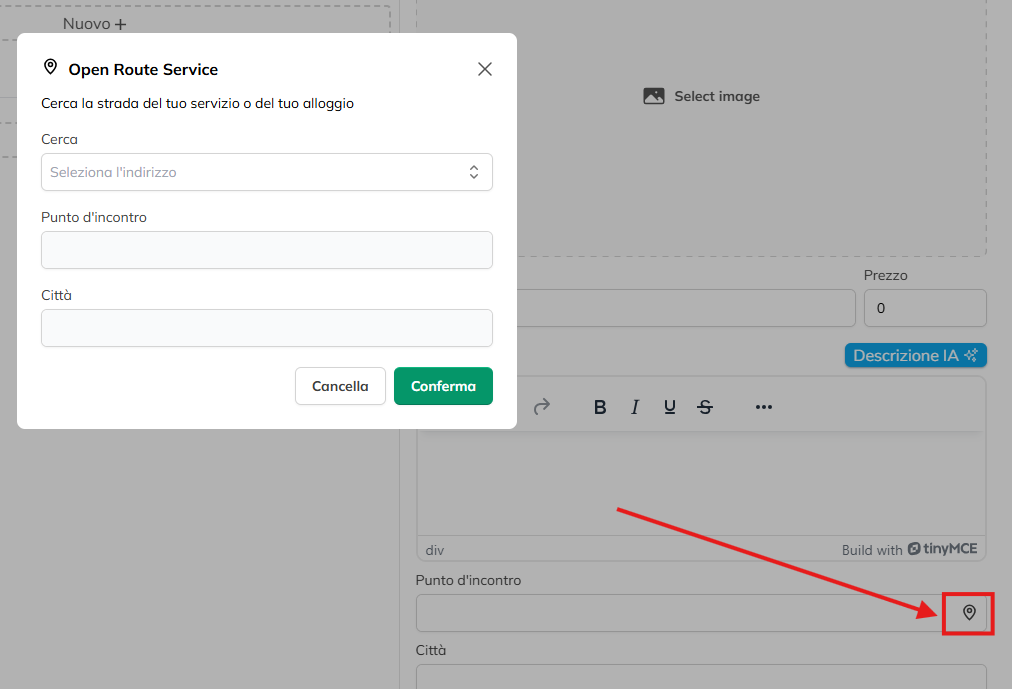
Inserite l’indirizzo dell’hotel potrete farlo manualmente o tramite l’apposita maschera cliccando sull’icona del marker.
Inserite la Categoria, il numero di stelle orari di check-in e check-out.
Inserite il numero di notti, qui vedrete che incrementando il numero verranno aggiunti giorni all’itinerario e verrà modificata di conseguenza anche la data di fine dell’itinerario nella barra laterale in base al numero inserito.
Fatto questo potrete inserire di dati della stanza/e prenotate cliccando su “Aggiungi Stanza”, per ogni stanza potrete selezionare un’immagine della stanza, scegliete un nome e inserite il prezzo.
Potrete inserire anche una descrizione e i dati degli ospiti.
Una volta completati i dati dell’itinerario potrete decidere se generare anche il plan della data di Checkout
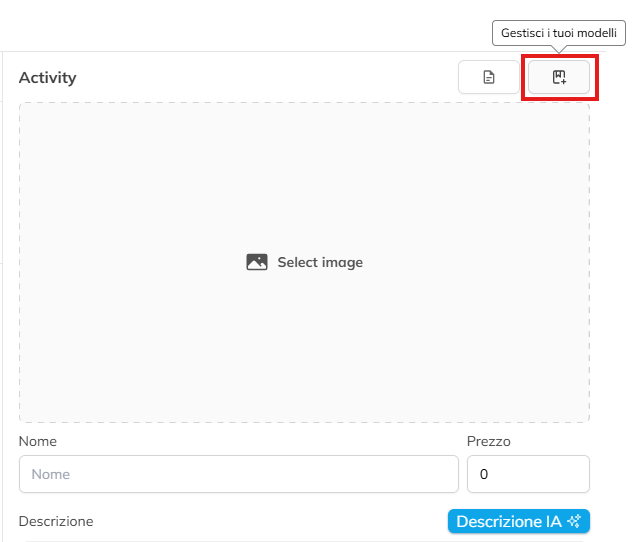
Per selezionare un Plan dai models already present, click on “Model”.
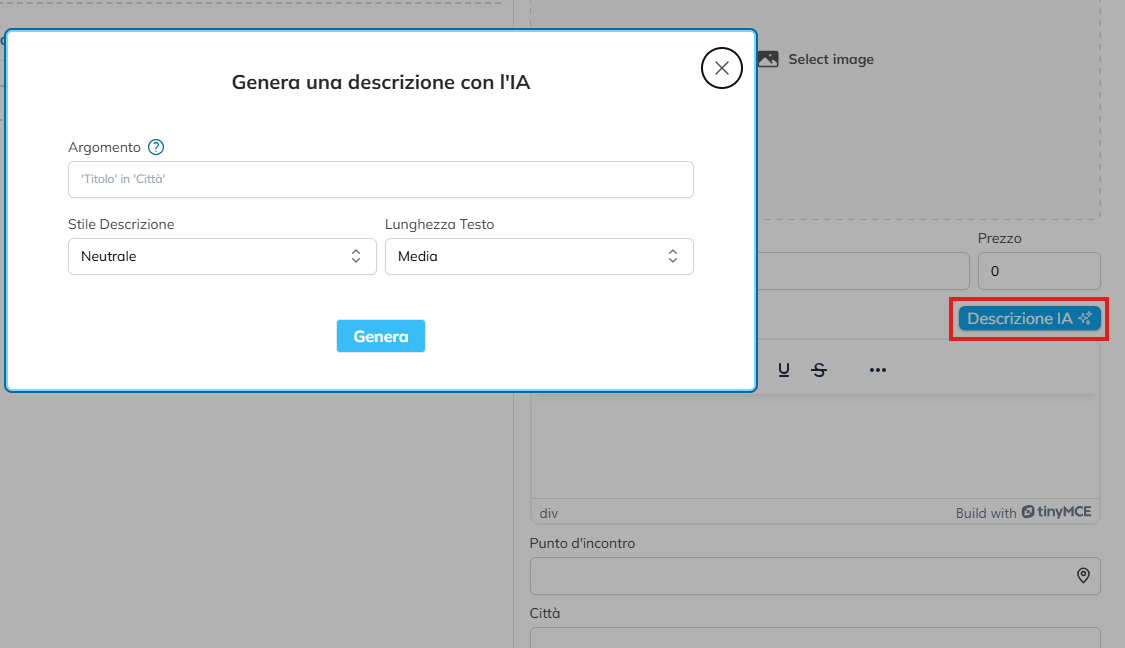
Descrizione IA
Per le tipologie di attività che lo supportano avrete a disposizione la generazione di una descrizione tramite IA. Per farlo cliccate sul pulsante “Descrizione IA”. Si aprirà quindi il popup di generazione, scrivete del testo che spieghi all’IA di cosa tratta la descrizione. Se non viene fornito alcun testo, la descrizione verrà generata basandosi sia sul titolo del piano che sulla città correlata, scegliete il tono e la lunghezza e cliccate su “Genera”, al termine dell’elaborazione il campo verrà compilato in automatico.
Selezionare un Luogo
Places
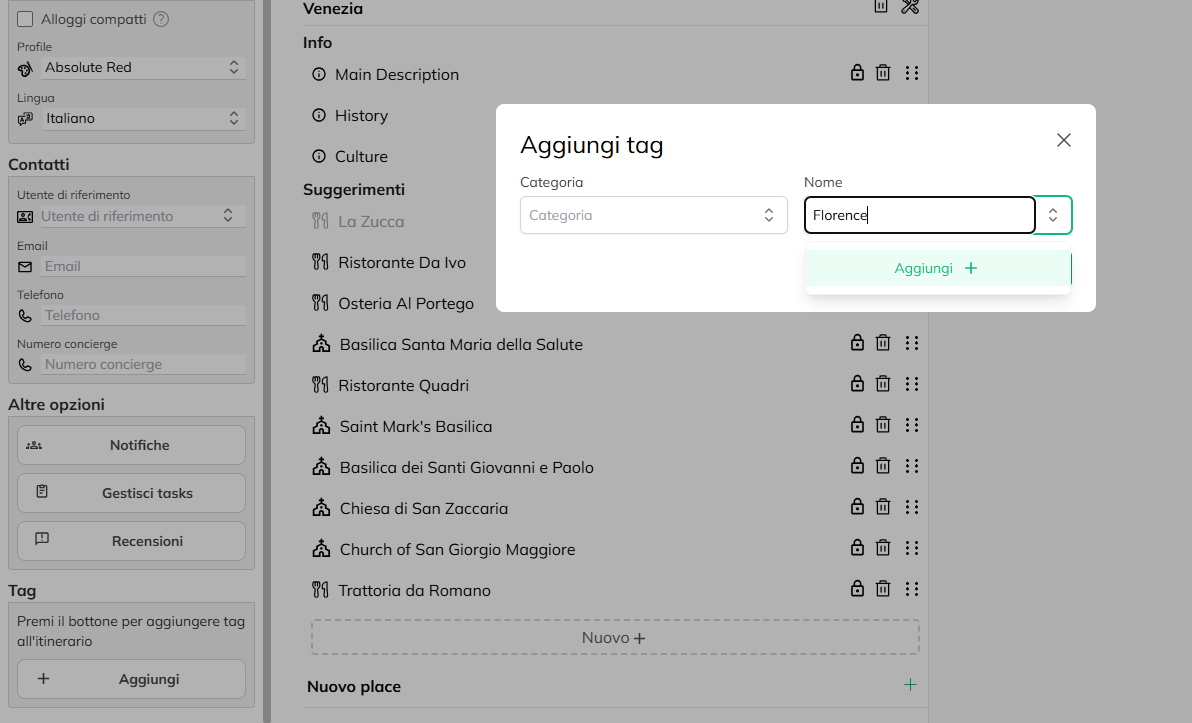
For the types of assets of the type “Info” or “Tip” you must have previously added in the “Places” section, in the case of a new route, the latter will appear after saving. The Places can enrich your journey with texts and suggestions about nearby points of interest. You can manually add information about attractions in the itinerary, or use AI to generate automatically.
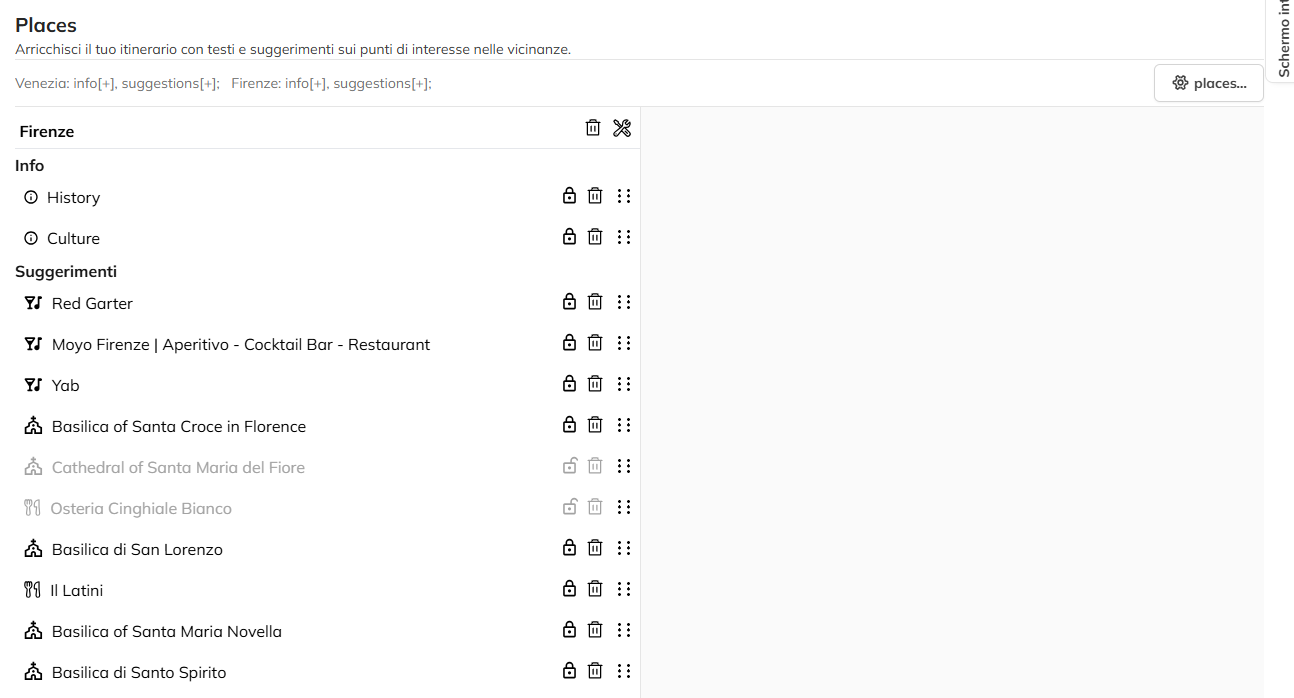
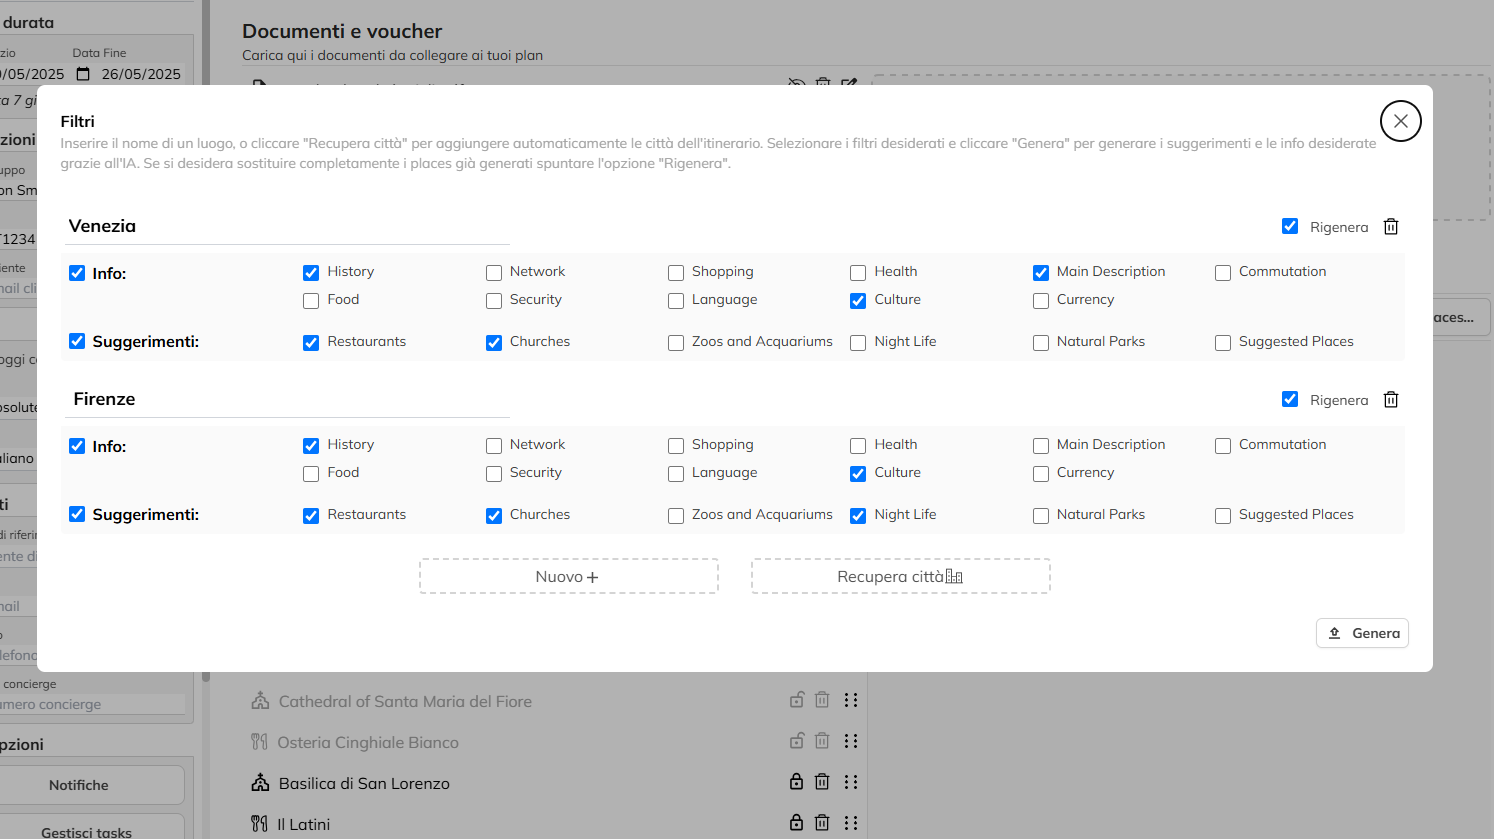
To do this, click on the appropriate button and enter the name of a place, or click on “Retrieve city” to automatically add city of the itinerary. For each city, select the filters you want and click “Generate” to generate the tips and the info you want, thanks to the IA. If you want to completely replace the places that have already been generated to flag the option “Regenerate” or “Delete” for delete.
The editor of the structure of the route also supports Drag and drop of tasks, and days through which you can move freely in the interface.

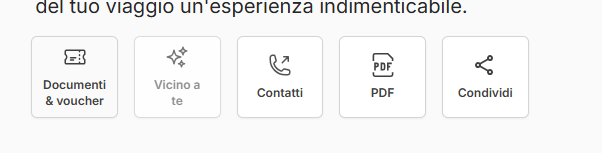
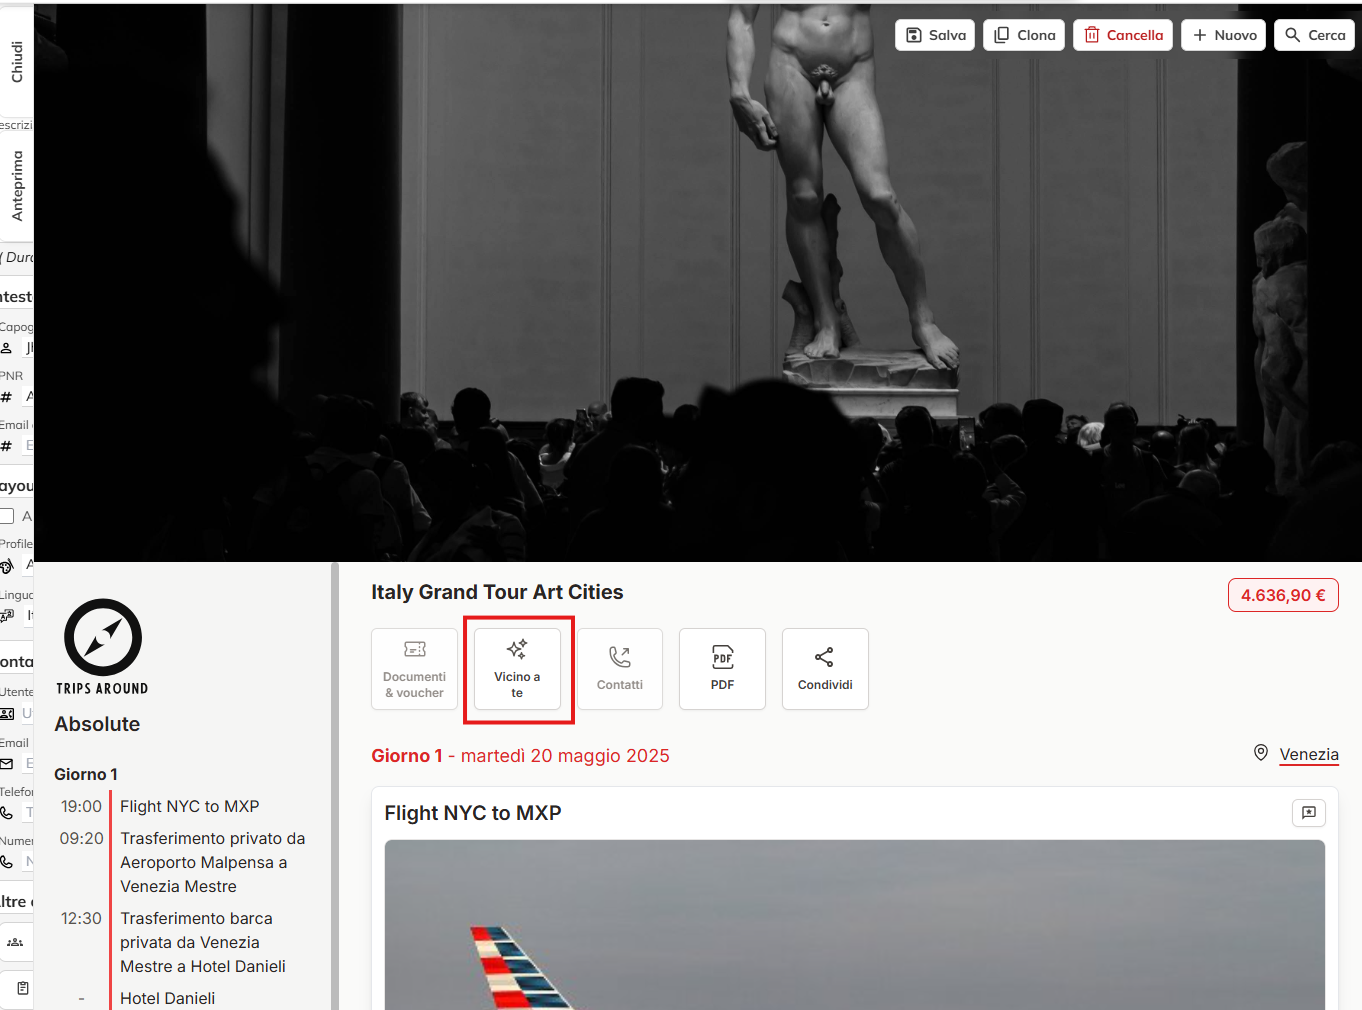
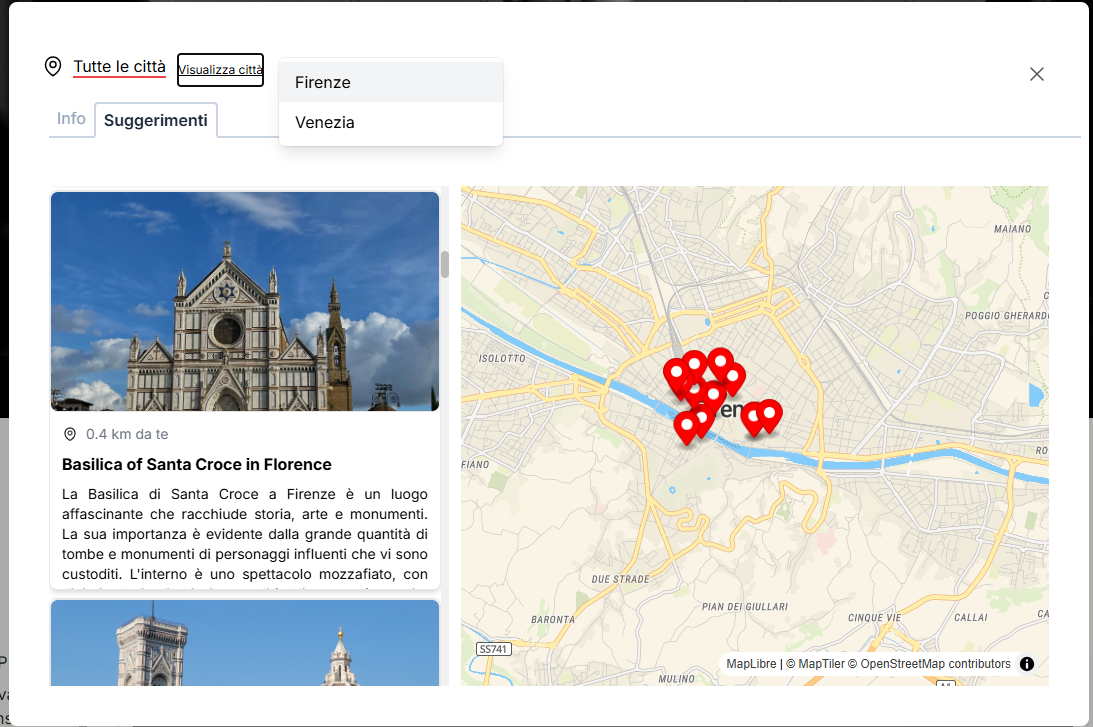
The tips and additional info coded for by this mask will appear in the relevant section of the itinerary by clicking on “Close to you” filterable for the city.
Key features
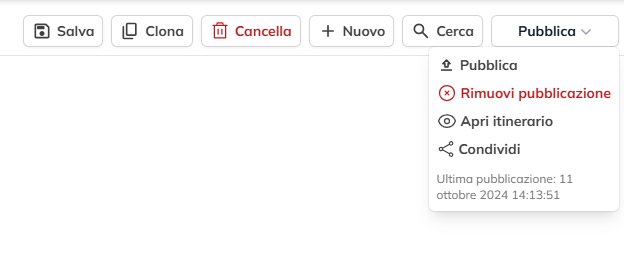
In the case of a new route once the changes are saved, you can proceed with the publication by clicking on the “Publish” button in the top right. The system will generate and then a link via which the route will be visible.
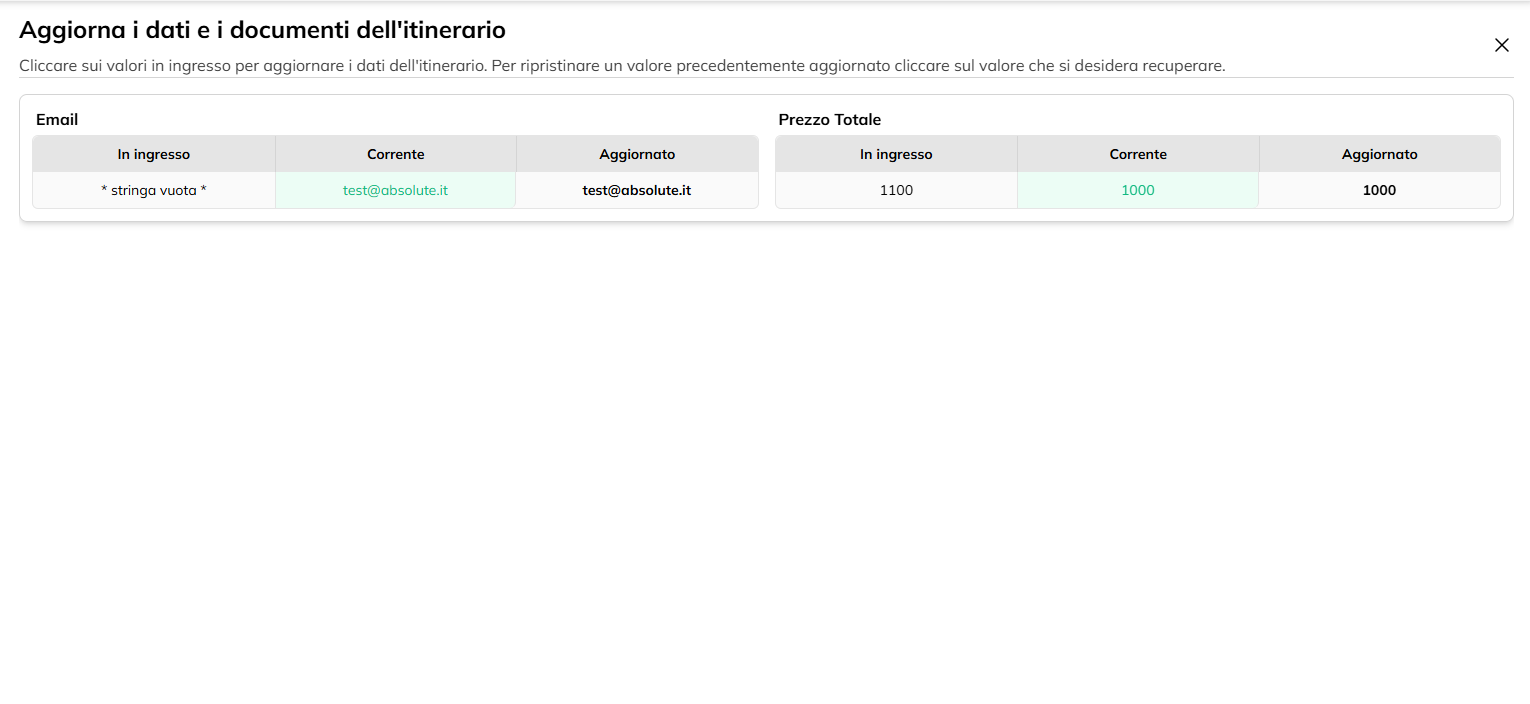
Every time you make changes to your itinerary, click on “Save”, also the latter will require a new publication to update the view via link.
After the first publication to activate other functions in the dropdown menu of the “Publish”button.
Share
Among these you will find the sharing feature through which you can share the link with the person directly entering the e-mail address of the customer. You can customize the message using the text editor of the same modal and sending it by clicking on “Send email”.

L’itinerario diventerà disponibile anche per l’azienda ricevente la quale potrà modificarlo a proprio piacimento.
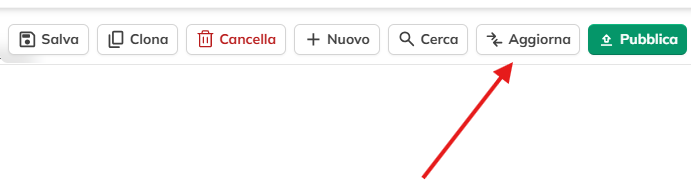
Avrete anche la possibilità di duplicare l’itinerario corrente cliccando su “Clona” o di eliminarlo cliccando su “Cancella”.
Cliccate invece su “Ricerca” per tornare alla schermata di Ricerca o “Nuovo” per creare un nuovo itinerario.